Are your walls dull and boring? Are you fed up with the wall pealing? Then it’s the right time to get your walls whitewashed. Getting your walls whitewashed is an amazing thing. It revitalizes your dull and unfurnished walls of your house. It gives the texture to the walls and gives a clean look to the house. With its white color it makes the home look larger. It also absorbs the heat and makes the room cooler. Following are some tips and guidelines which you can consider. This article will also give you the basis of preparing the solution and applying the same on walls.
White wash can be applied on various surfaces like plaster, cement or brick walls. It can also be applied on wooden walls.
Things to do before applying whitewash:
Clean the surface where you want to apply whitewash. Clean all the spots of grease or smoke thoroughly. Clean the dirt or dust on the surface with a cloth. If there are holes on the walls then fill the patches with mortar and allow it to dry for at least 2 days before whitewashing the surface.
Preparing the solution
-

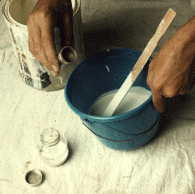
Guidelines for Whitewash Take 10 liters of water and add about 2 kgs of fat lime powder. Mix them to make a solution like a thin cream. Allow it stay for a day or so. Make sure you mix appropriate amount of fat lime power into water.
- Now add 40 grams of gum into the solution of 10 liters of water and lime solution. Then add 6 grams of indigo into the whitewash solution. Remember the proportion of indigo should be only up to 2 grams for every kg of fat lime into the water. Mix the solution thoroughly and then screen it through a clean cotton cloth. Whitewash solution is ready for application.
- Apply whitewash on the surface with the help of brush. Apply it in both horizontally and vertically on the wall. Give 2 to 3 coats to the surface. Always apply the next coat of whitewash only when the earlier coat gets dried up.
- Make sure there are no brush marks visible on the coat. If there are, give finishing touch and allow it to dry. If you want to paint both ceiling and walls then it is advised to first whitewash the ceiling then moving on to walls.
Things to Remember:
- The surface where you want to whitewash should be even. The uneven surface should be filled with putty. If there are holes on the walls then fill the patches with mortar before heading for whitewash.
- You can use Fevicol or DDL to increase adhesion. Detergent or common salt can also be mixed into whitewash to increase a strong adhesion.
- Mix Indigo to increase whiteness.
- Whitewash your new construction only after eight to nine months of completion of plaster.
- Protect your other home interiors from splashes while whitewashing. Cover them up with plastic or old newspapers.
- As whitewash is good in absorbing heat make sure you get your roof whitewash.
Colorizing
You can also add color to your whitewashing solution. The whitewash need not have to be in white color always. You can paint your room in yellow, pink or green. Mix the color carefully. Make sure you use the right proportion of concentrated color.
Benefits of whitewash
- It keeps the home clean and germ free
- It acts as a primer.
- Revitalizes the dull and unfurnished walls of your house.
- It gives the texture to the walls and gives a clean look to the house.
- With its white color it makes the home look larger.
- It also absorbs the heat and makes the room cooler.